
How to use uLaw's virtual verification

uLaw now supports compliant virtual verification within the software. Scroll down to the heading to learn how to do it.
Background
In keeping up with the digitization of the legal profession in Ontario, the Law Society of Ontario has recently laid out new rules for virtual client identification and verification.
So, even though you're not sitting with a client face-to-face, it is necessary to be diligent about verifying who they say they are.
According to LSO, the use of technology to handle this are as follows:
Using technology to compare the features of the government-issued photo identification document against:
known characteristics (e.g., size, texture, character spacing, raised lettering, format, design)
security features (e.g., holograms, barcodes, magnetic strips, watermarks, embedded electronic chips), or
markers (e.g., logos, symbols).
How to use uLaw virtual verification
Compliance is key! That's why our developers made this new feature, which is in 100% compliance with Law Society guidelines
Step 1 : setup
Start by logging into your uLaw account. Navigate to:
settings (top right-hand corner) -> Contacts (middle button)

Scroll down until you see "Virtual Client ID Verification". Select 'uLaw' in the dropdown

Hit the SAVE button
Step 2: Initialize a virtual verification process
Once Virtual Client Id Verification is enabled and you've saved your preferences, you may now proceed to 'contacts' (left-hand menu) and select a contact of your choice.
(We recommend the contact you pick is a prospective client; since this is what the feature is geared for)
Ensure you have filled out an email for this contact.
Because you've yet to verify this new client, when you first send an email to this contact it will ask this contact to virtually verify themselves. In this way, the guidelines of the Law Society of Ontario are followed.
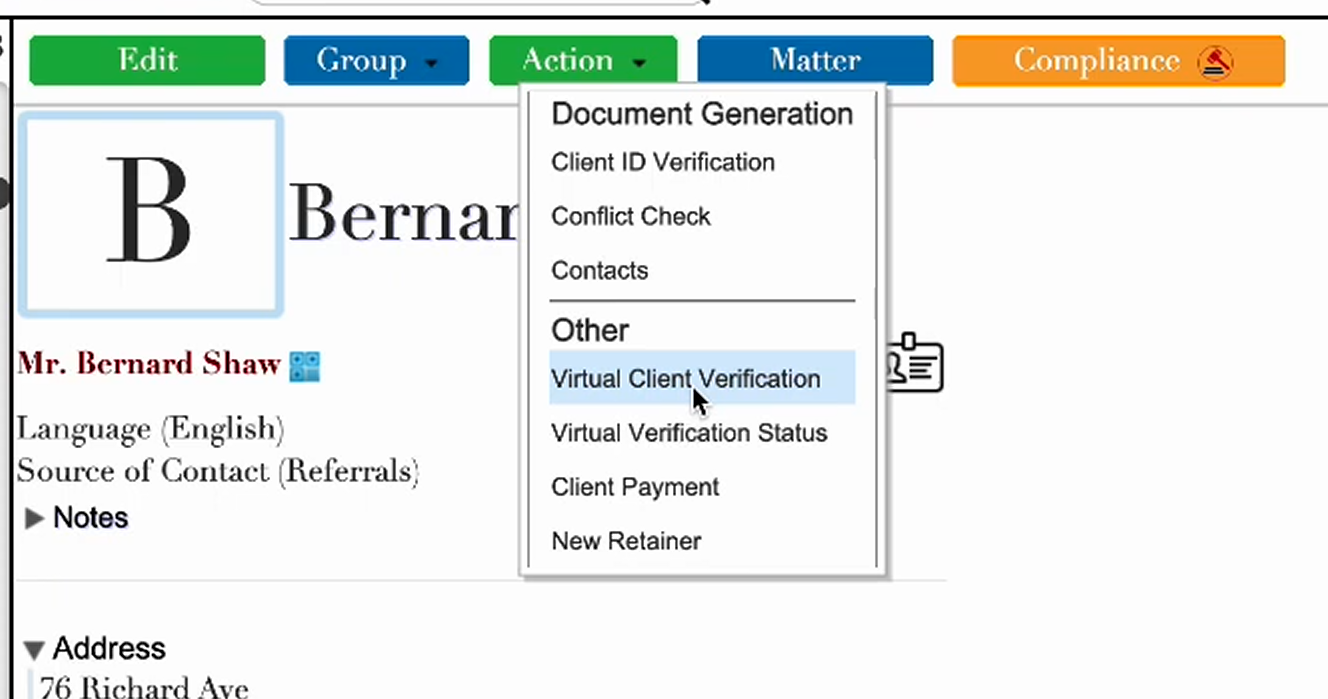
Navigate to 'Action', in green. (see image above) and click "Virtual Client Verification." You will see a menu that looks like this, showing the different verification initiation options for the client.
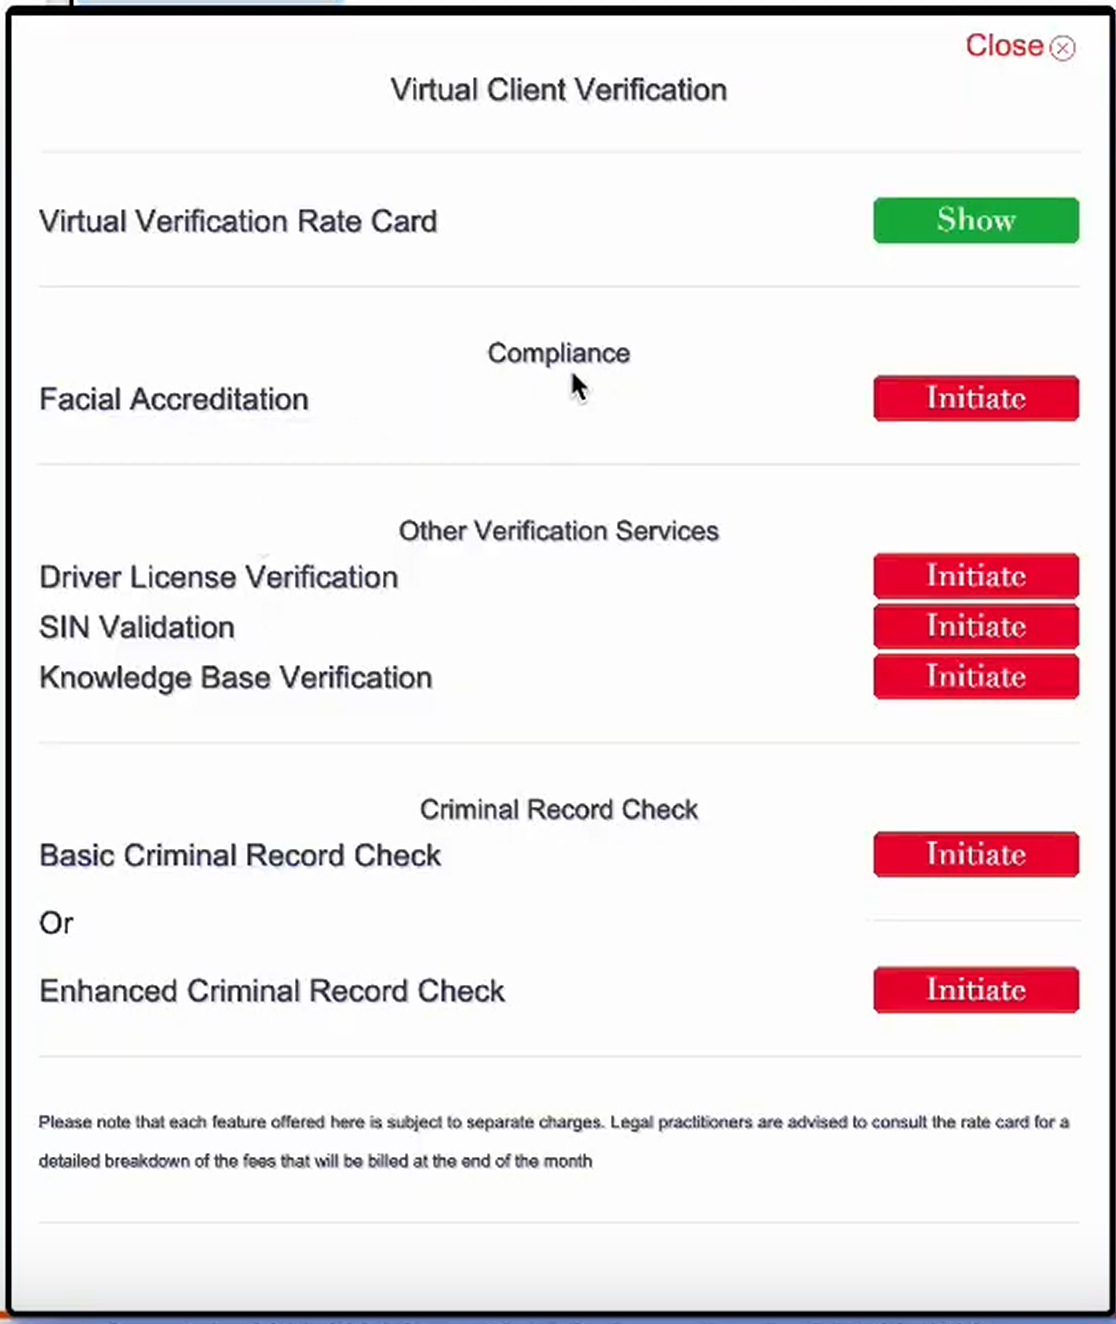
It isn't just facial accreditation, but SIN Validation, knowledge Base verification, Basic and Enhanced Criminal Checks.
For demonstration purposes, let's stick with facial accreditation. Select that button. Here you'll be prompted to accept that you understand you're paying the rate for the Virtual search. Be sure to review the rate card, which can be viewed by clicking the green button. (see image)
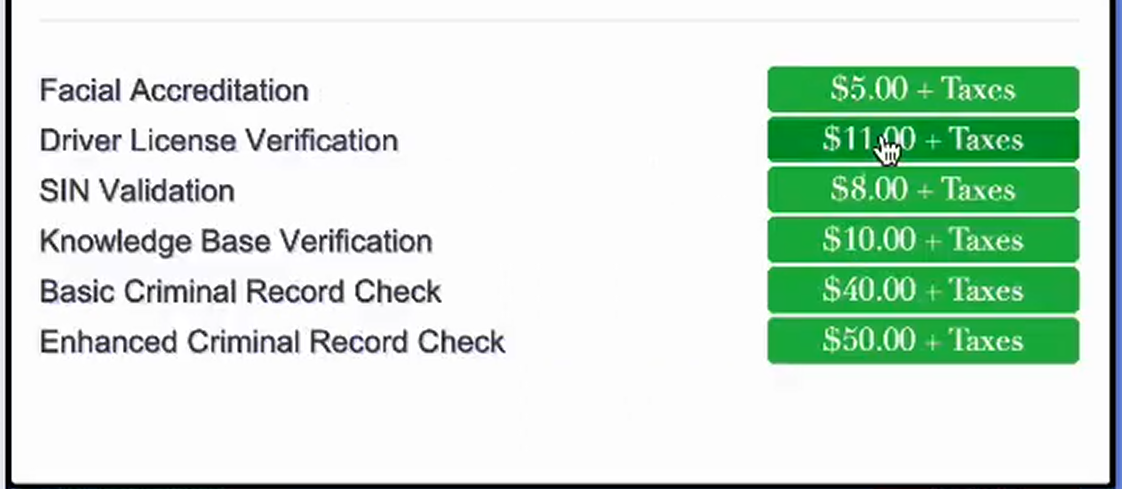
For your province it will show the applicable charges.
Step 3: Check status
In order to use virtual client verification, your contact must submit a consent form which was requested to them automatically via uLaw.
We recommend that after some time passes, you check in on the status of these verifications. You can do this by either seeing your email or within uLaw.
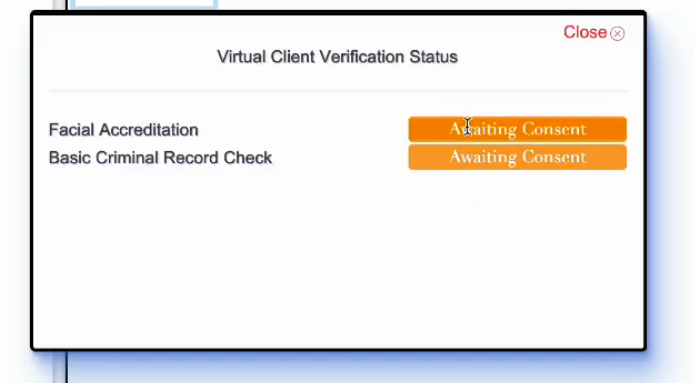
Checking Status in uLaw:
(under contact) Action->Virtual Verification Status. This will open a small menu which will show the status of the verification
Checking status from your Email:
When you conduct a virtual verification search, uLawPractice will send you an email. It will look something like below:

This will indicate the status of the file as well. When the status changes you can expect another email from uLaw as well.
Step 3 (done by clients):
If a uLaw user has submitted these verification requests and the contact has consented, they'll be sent emails with instructions to actually begin the verification process.
For instance, if you're wishing to do facial verification the client will be requested to take a picture of themselves; and a photo of their driver's licence, passport, and then the system will take care of the rest by using technology to discern similarities and likenesses between the identification document and the selfie they've taken of themselves to verify if they're the same individual.
Verification Client Reports:
Visit the status menu again and download, for example, a completed "virtual verification client report".
This report will be generated for a uLaw user based on the results of the virtual verification conducted after the client completes the activities they were requested.
It will look like this:
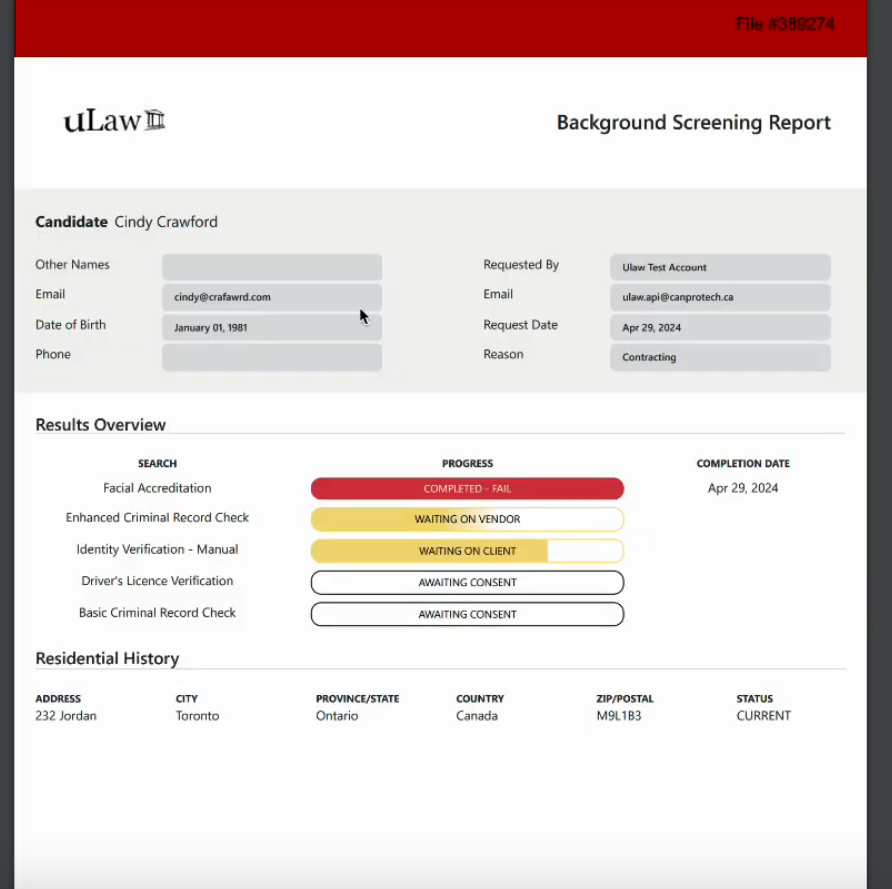
This shows the background screening process of a "Cindy Crawford". She failed the facial accreditation check.
This report will also show the status of the different checks that were submitted. This report progressively tells you where you are based on the present status of the process as of the time you generate the report.